Class Activities

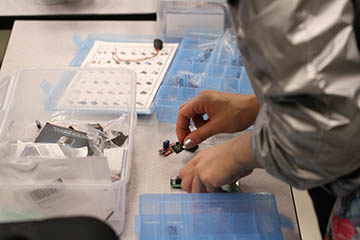
A student is prototyping the Arduino project. (Courtesy of Andrew Ringler.)

This course follows a sequence of activities that gradually provide students with increasingly complex real world experiences relating to working on a team to define and accomplish a creative endeavor. The structure of the OCW resources mirrors the sequence of activities and are labeled: “Getting Started,” “Guided Tutorial,” “Collaboration,” and “Expand on the Tutorial.” Each activity is described in more detail below.

Getting Started (Session 1): This involves introducing students to a set of existing online tutorials about the technology being learned. Students should be able to continue using these resources after the class to gain further expertise (since these workshops are only two weeks long we aim to empower students go continue learning once they have “learned how to learn” during the workshop).

Guided Tutorial (Session 2): This includes having an instructor model how to use the tutorials through a short live demo, where students are given sufficient time to complete each action along with the instructor - it is important for the instructor to model how to ask for help when confusion arises.

Collaboration (Sessions 3–9): After the short live demo, students should form small teams to collaborate together to complete a full tutorial. It is important to explicitly instruct students in how to ask questions of each other and how to help each other learn with kindness.

Expanding on Tutorials (Session 2): After completing a good tutorial, students should have enough knowledge to “Expand on the Tutorial” by making small technical and creative modifications to internalize what they’ve learned and personalize what they’ve created.

Summary

It is crucial for students to understand the importance of collaborating in groups and discussing ideas openly with their peers. One of the key features of our pedagogy is the belief that collaboration and social support bolster learning and need to be explicitly modeled. We facilitate the development of interpersonal skills at many levels through designed activities; this helps students effectively communicate their ideas in a clear and professional way as well as help students learn to respectfully engage in hearing the ideas of others.

Students brainstorm ideas for their Arduino projects. (Image by H. Sharon Lin, MIT OpenCourseWare.)

Details

For the modern technique of collaborating on software projects, we have included a short GitHub tutorial at the beginning of the class and provided access to a common repository where groups can create websites and include relevant documentation for their projects. Collaboration ideation is modeled by organizing a brainstorming session before team formation to align students with similar interests together. Students are encouraged to learn from other groups in the class in case they are working on achieving similar goals and/or face similar issues while debugging their projects. We use group exercises adopted from Improv comedy during the course to help students become comfortable and familiar with each other’s communication styles. Exercises originally designed to prepare Improv performers work great to prime students for group activities, serving to improve communication between group members and across groups. Exercises are chosen by the instructors depending on the activities, some work best to prepare students for brainstorming and other exercises work well as ice-breakers before team formation.

Collaboration: Introduction to Git/GitHub

Andrew Ringler provides an overview of the GitHub software collaboration toolset. We use Git and specifically Github to facilitate collaboration and documentation within and between groups. This video introduces students to concepts of collaboration with Git.


Collaboration: Red Ball During Class

Kyle Keane leads the class in an improv comedy activity called “red ball” in order to help students become more comfortable with each other and get to express themselves a bit non-verbally.

Summary

Over the course of the class students are introduced to various electronic components such as, actuators: DC motors and servos; sensors: Temperature, humidity, clap, knock, IR, moisture, flame, motion; LEDs, buttons and so on, that can be interfaced with Arduino.

Instructors demonstrate and explain the basic purpose of each of these components and walk them through the specific software library that is used to incorporate such hardware in their code. Instructors can use the Arduino website to see more class videos and tutorials.

Students work on prototyping their Arduino project. (Image by H. Sharon Lin, MIT OpenCourseWare.)

Purpose

We believe it is important for students to learn that creativity, especially in highly technical fields, often stems from extending and expanding on the work of someone else. Many students will believe that what they create is not creative if it is not completely novel, it is important to encourage students to set this philosophy aside for this class, since we are learning a new technology and will learn together by putting our own unique twist to other creative projects already showcased online.

Logistics

After hearing about collaboration and having to learn the GitHub workflow, students are often a bit introverted and need some encouragement to become social again and to find a partner for this activity. We employ improv activities for this when needed.

Once students pair up, they are usually very self-managing in deciding on a modification and executing it together. It can be helpful to walk around and jump into each team to ask them about their modification and model collaborative brainstorming and troubleshooting to ensure they are moving in a positive direction.

Summary

The goal of this activity is to communicate the structure of the class, give a brief overview of everything that we will cover over the course of the class, convey the expectations and to get the students comfortable enough to form into groups of 2–4 and to get them started with setting up the Arduino IDE.

Students play improv game Red Ball in Arduino class. (Image by H. Sharon Lin, MIT OpenCourseWare.)

Course Overview

We begin the class by introducing the teaching staff and giving some background about what brought us to teach this course. We also cover the timeline of the course and discuss the type of projects the students will be working on during the project phases (having videos on hand for demonstrating the project expectations is very helpful). This introduction is an important time in which you as an instructor can model the type of vulnerability and engagement that you expect from the participants. This is also the time to set expectations about student conduct and behavior. For this class, I explicitly state that we will be using online tutorials and that the whole point of being in a classroom together is to engage in social learning through collaboration and support. This is a good time to cover any other logistic stuff such as video release forms.

Introductions

The goal of this first activity is to get students comfortable enough to form a group of 2–4 students. Since this is the first time the students are meeting, and the class is built around group projects, it is important to give the students some fodder for connection. The first way to facilitate this is through the usual activity of asking each student to tell the whole group a few factoids about themselves, such as what they study in school, why they came to the class, if they have any previous experience with the technologies, and what their favorite one-handed food is. During this type of introduction, it is helpful to give a list of items for each student to speak about, this helps shy students have structure for introducing themselves and helps gregarious students stay within a reasonable time.

Once the group has done some intros, they should feel a bit more comfortable. To further facilitate the social mobility of the group, we employ some simple group activities that are commonly used by improv theater troupes to open dialogue, build bonds, and help students shake out some of their jitters. This also helps the students to further connect with the instructors of the course. This improv game is Red Ball


Getting Started: Introducing Introductions

Kyle Keane describes the first ice breaker of the class and how we will manage the task of having everyone introduce themselves.

Getting Started: Icebreaker

Kyle Keane describes a basic icebreaker for the class to introduce themselves to each other by providing information about things like where they are from, their favorite food, and what they hope to do in the class.

Summary

Students form groups of 2–4 and begin by learning what a microcontroller is and understanding basics behind the Arduino board. They learn to interface it with their laptops and begin by uploading some of the example codes such as ‘blink’. In addition, they try to build basic circuits with LEDs and resistors on solderless breadboards and interface buttons with Arduino and the circuits they’ve built. On this page, we describe the purpose and logistics of running this activity.

The groups watch Arduino tutorials for their projects. (Image by H. Sharon Lin, MIT OpenCourseWare.)

Purpose

This class was designed to introduce students who had little or no previous experience of working with hardware and / or software such as Arduino to design interactive open-ended projects. Since this is a short course we feel it is important to introduce students to collaborative tools such as GitHub and online Arduino forums so they can advance their skillset after the end of the class.

Team Formation

After introducing the basic logistics of the activity, it is important to set expectations for the students to work together at a pace that is suitable for every member of the group. In order to make this a reality, it is important to instruct the students to be very vocal about every question they have, asking the group to pause and discuss the question. Again, remind students that they are here because of the social support, not just to rush through a tutorial or build a final project. Tell the students that the point of this activity is as much to talk as it is to do. The more students learn to be vulnerable and ask questions, the more they will be able to succeed in the modern collaborative environment. It can be helpful to guide students to form groups after a brainstorming session to align students with similar interests. Also, informing students that they should jump into another group for any reason at any point.

If you can model what it looks like to ask a question and answer a question supportively, it can also be a very potent technique for ensuring a supportive experience for students. This is an opportunity to learn and to learn to teach.

Tutorial

The class discussions, tutorials from the Arduino website and other resources (listed below) will be used to help the students get started with the process of creating interactive projects with the Arduino.

Course Info

As Taught In
January IAP 2017
Level
Learning Resource Types
Projects with Examples
Instructor Insights