
Engineering is an iterative process where you can reevaluate as you generate new results and gather more observations from your prototyping and testing. Effective engineering starts by considering the intended audience or customer’s needs. This “why” helps you define the “how” as you generate the goals of your research or product development.
For example, a person goes to the local hardware store and asks for a drill for their home improvement project. What the customer actually needs is a hole. The drill is the tool to fulfill that need.
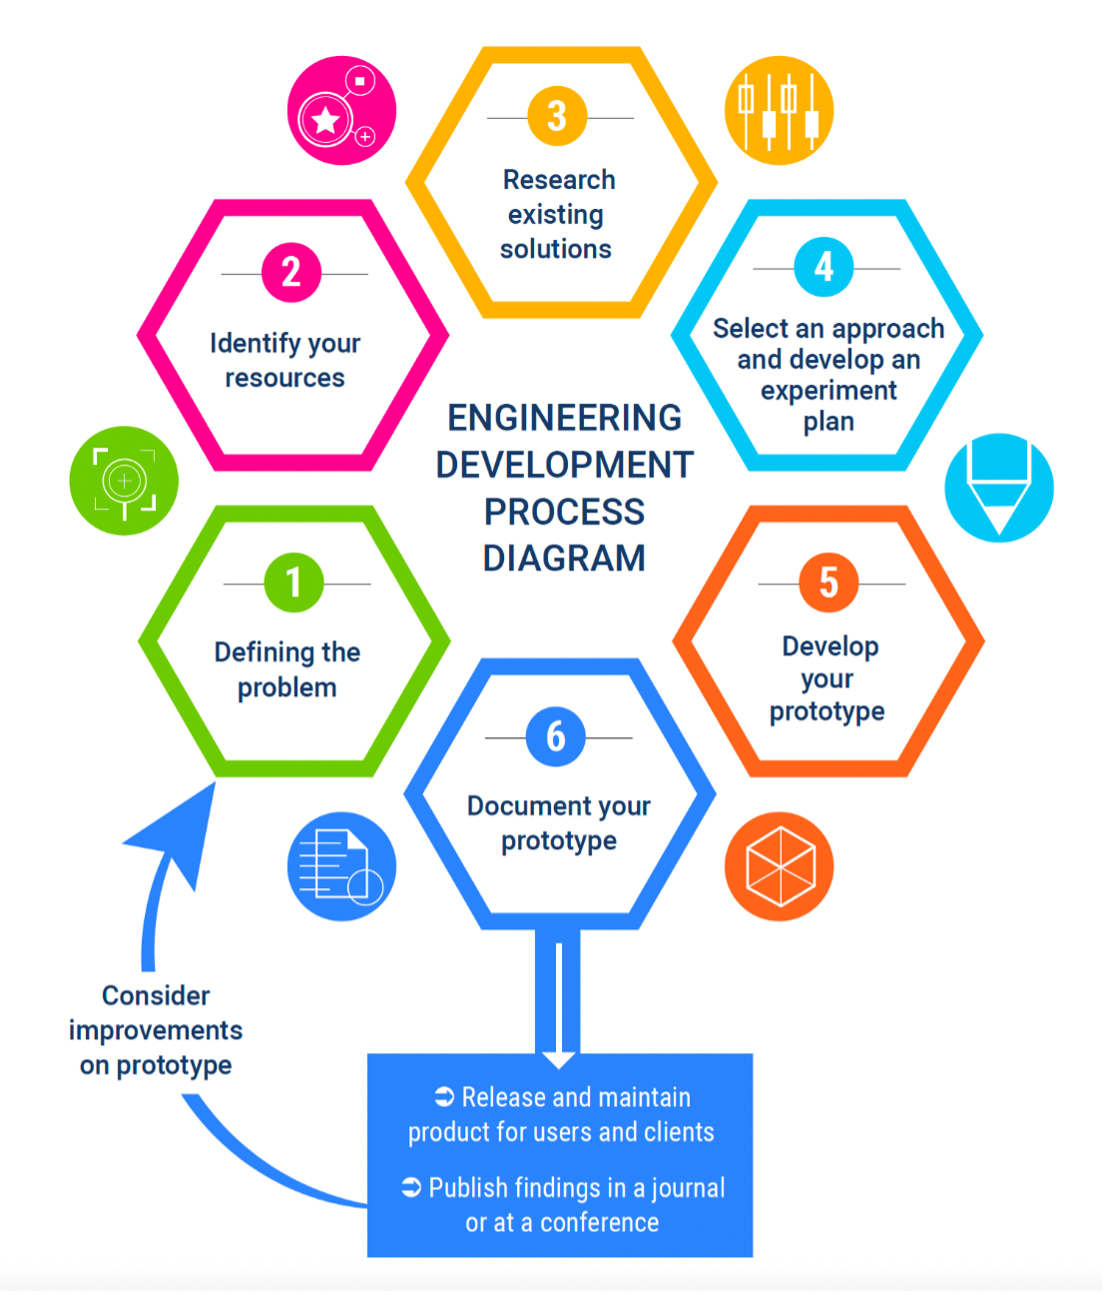
Steps 1 & 2. Defining the Problem and Identifying Your Resources
Part of defining the problem you’re going to solve is identifying the trade-offs present in the problem. This often means balancing your resources, such as time and cost. These parameters narrow the scope of what you can address in your solution and ask you to make decisions about your project’s development path going forward. The parameters can change over time and these decisions can be reevaluated as your project continues. Still, considering your available resources will help you to narrow your options to the most feasible ones for your current set-up.
Once you have a sense of the problem and of what resources you have available, you can more effectively frame the question you want to address.
Step 3. Research Existing Solutions
The world of engineering is a global one. Often there are existing solutions for problems we face if we just consider how to adapt them to our specific situations. Therefore, it’s good practice to conduct background research on your chosen problem and gather data from existing studies or experiments.
With this information, you can evaluate the trade-space your question falls under. You can see what has already been explored and where there are gaps for you to contribute new ideas.
Some questions to consider are:
- Who else has also had this problem?
- What developments or progress was made in past efforts to address this problem?
- Where are there still unknowns?
Step 4. Selecting an Approach and Developing an Experiment Plan
Test out your ideas on paper or a whiteboard, particularly with others. While schools usually assign individual work, engineering usually involves teams and these steps work well with groups since you can bounce ideas off of your teammates. Take some time to see which of your initial concepts are a practical fit to solve your problem and answer your question. If the idea fits and the trade-offs are acceptable, then you have the beginning of a prototype to work off of.
Step 5. Develop Your Prototype
As you can see, a big part of engineering is the lead-up to actually experimenting. These first steps allow you to be a more effective and targeted engineer/researcher and ensure that what you’re developing is going to be both useful and novel. The forethought and brainstorming that you’ve spent time on here will also save you time later in the process. Now that you have a solid idea and plan, you can delve into the technical, using the most appropriate medium (potentially programming) to develop your prototype. Depending on your desired end project this prototype can be virtual (e.g., code), physical (e.g., lab work), or a mesh of the two (e.g., embedded systems, radars, etc.).
Step 6. Document Your Prototype
Once you’ve developed your prototype, make sure to create documentation. Even though this is often presented as a less exciting part of the process, it’s very helpful for you, your co-developers, and others who might want to use it. The knowledge might be fresh in your mind now, but it won’t always be. Say you turn your attention to another project and come back to your prototype a year later. What might have seemed obvious then probably isn’t at the forefront of your mind anymore. That’s where documentation can be helpful. Good documentation is clear, comprehensive, states assumptions, and can be used to both introduce people and to refresh their memory of your prototype.
What now?
As we mentioned before, research and engineering can be iterative. Your first prototype often isn’t your last one. For industry this cyclical development cycle is quite normal. Think of how phone manufacturers like Apple or Samsung release a new phone generation every year. This is possible because the developers and researchers of those companies continue to iterate on the products they have, adapting and improving them further.
Let’s say that you’ve gone through the engineering research process and created your prototype. Now what? Since you frame your initial question around a target audience or customer, you may want to put this prototype into production. This includes both rolling out your product and the longer-term actions of educating and working with clients on product operation and maintenance. Your work will be deployed by users. For academia, like research done at universities, this may mean publishing your findings at a conference or in a journal.
In recent years it has become easier to run experiments, thanks to the introduction of online tutorials, plug-and-play kits with boards, and public facilities like Maker spaces where people can use the supplied machinery and materials instead of setting up a personal lab.


